How to setup automatic logging in an iTerm2 profile
I primarily use iTerm2 on macOS as my terminal of choice. It’s got more tweakability, Quake Mode, and that pleasant Minimal theme that blends the titlebar into the rest of the window.
Sometimes it’s useful to log a terminal session, but I don’t want all of my terminal sessions to be logged. So, I’ve set up a special profile in iTerm called “Logged Terminal”. I open this terminal profile when I need to log what I am doing in the terminal.
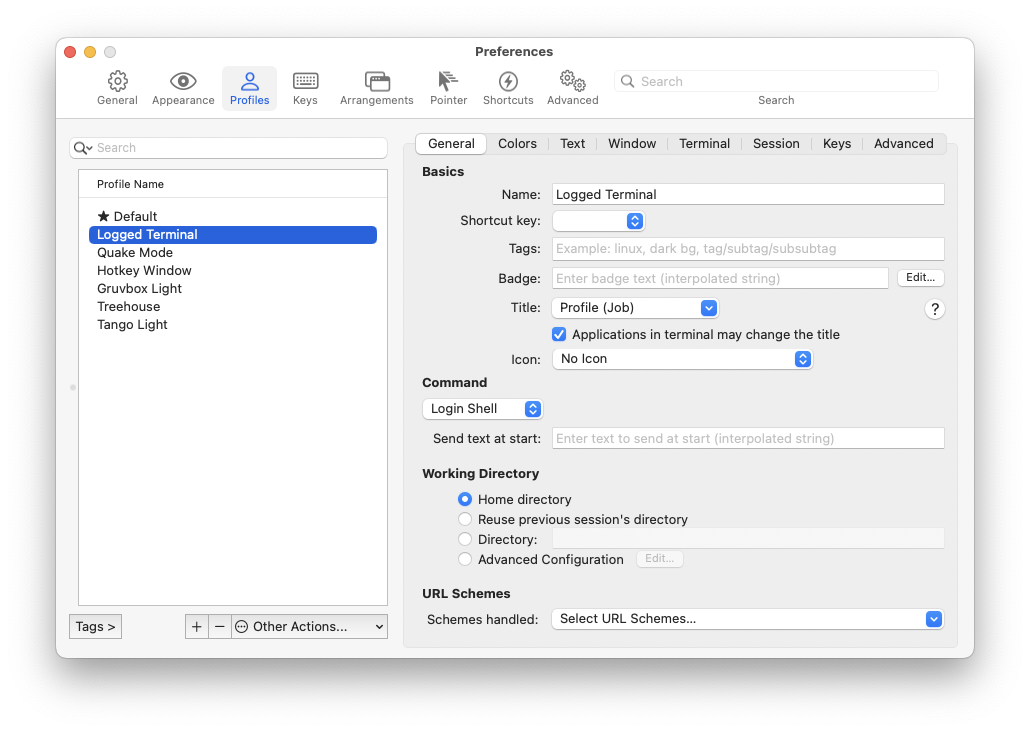
First, create this profile. Then, head to the General tab and name it something cool like “Logged Terminal”. I like to make it easier to know which terminals are logging, so I set Title to “Profile (Job)”.
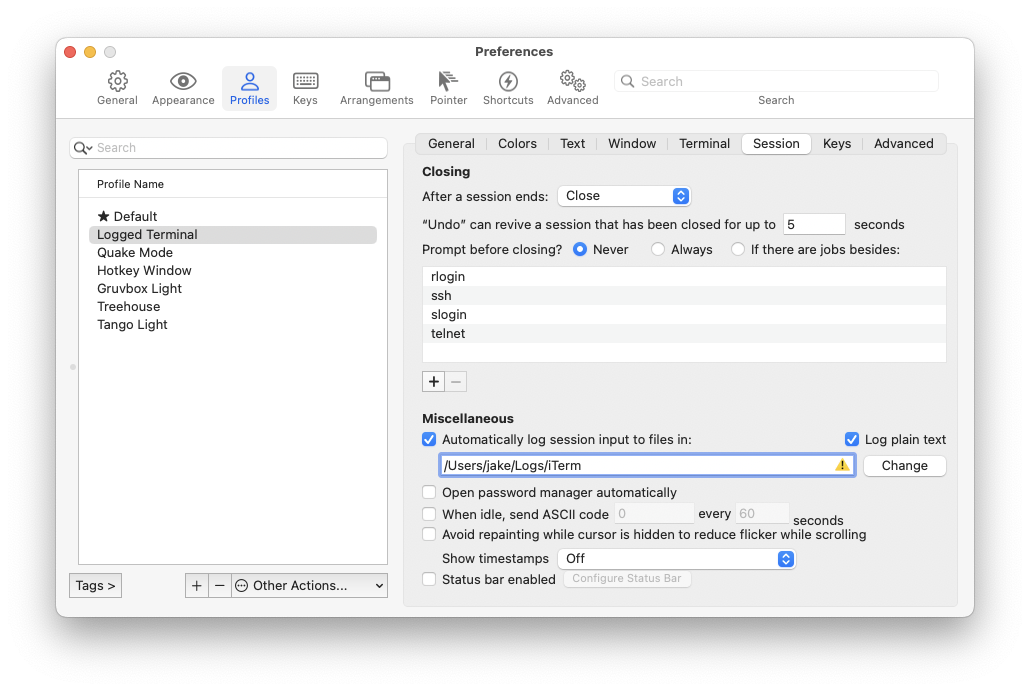
Next, head to the Session pane. Check Automatically log session input to files in
and set an appropriate directory for the log files. I also recommend checking
Log plain text for more legibility and usefulness, in case you need to
copy/paste configurations, etc.
I like to distinguish my log windows even more than changing the title, so I also head over to the Colors tab and pick a unique color preset for this Profile: Solarized Dark.
You can find more color schemes than you know what to do with at the canonical iterm2colorschemes.com.
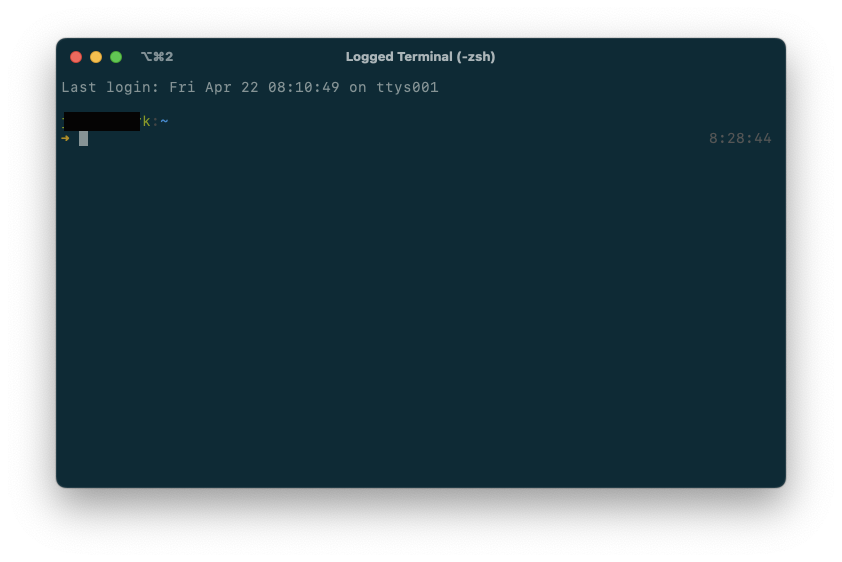
Now, when I’m SSHing into a router or switch, I can either right-click on the iTerm2 icon in the dock and select New Window->Logged Terminal, or launch it via the Profiles menu.
When I’m done, I can go to the directory I specified above and find the logs.
